新調したMoodle(2.1.1)サイトで Moodle Network の設定にトライ。
今回手こずったのは、2.0 以前とはアドミンメニュー項目の配置が微妙に変わっていて、去年やった
手順(↓)がそのままでは使えなかったから。
- Admin > Network > Settings - Turn Networking ON
- Admin > Network > Peers - Put the URL of the partner Moodle
under "Add New Host" and click Add.
- Admin > Users > Authentication - Enable Moodle Network
authentication plugin. Click on 'Settings' and
enable auto_add_remote_users.
- Admin > Network > Peers - Click on 'the partner Moodle', and
click on 'Services'. Enable SSO-IDP publish & subscribe, and SSO-SP
publish &subscribe.
- Admin > Users > Permissions > Define Roles - Allow
appropriate roles to have the privilege to "Roam to a remote Moodle
moodle/site:mnetlogintoremote".
- Go to the intended Moodle course, and add the 'Network Servers'
block.
今回の手順はこちら(↓)
- Site Administration > Advanced features - Turn Networking ON
- Site Administration > Networking > Manage Peers - Put the URL of the partner Moodle
under "Add New Host" and click Add
- Site Administration > Plugins > Authentication > Authentication - Enable MNet authentication plugin. (*Click on 'Settings' -> fig1)
- Site Administration > Networking > Peers > 'the partner Moodle' > Click on the 'Services' tab. (-> fig.2)
- Site Administration > Users > Permissions > Define Roles > Authenticated Users - "Edit" > Allow "Roam to a remote Moodle
moodle/site:mnetlogintoremote".
- Go to the intended Moodle course, and add the 'Network Servers'
block.
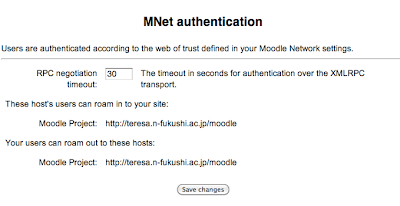 |
| fig.1 |
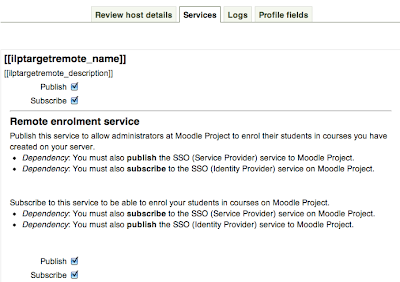 |
| fig.2a |
 |
fig.2b
|
赤字部分は、
対応関係がはっきり分からない箇所(↑)。設定できているのかどうか自信なし。
必要な設定は大体やったが、授業用Moodle の "Network Servers" ブロックに加えたリンクをクリックすると、エラーが出る(fig.3)。原因は不明。
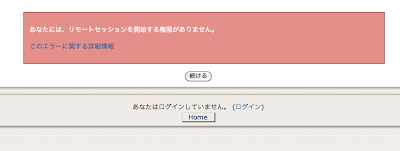 |
| fig.3 |


